We know that images are essential to creating great content and communicating clearly. Whether you're trying to explain something or show how something works or just adding elements to help grab a reader's eye, images can help get your point across
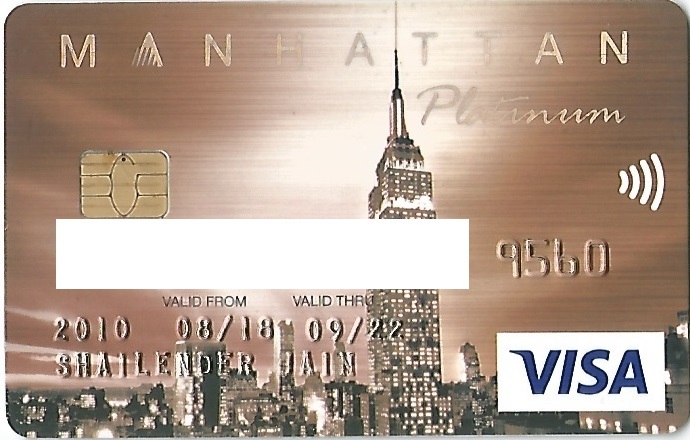
better and faster. But there is always a big difference between using an image and using the right image. There is always a need to hide something in image. This could be related to some confidential information. For e.g. you want to share the credit card image with any institute, but there is always a need to hide credit card number. This tool helps to hide the sensitive or confidential information in the image which needs to remain hidden.
- What is blur photo?
Most of the time the need is to improve resolution or clarity of images/photos. However, there will be many occasion when you want to hide some area of your image. This could be due to confidential information or data privacy related matter. In such cases there is always a need to decrease the clarity of the photo. This process is called "blur photo".
In most of the cases the process to blur photo is for some specific area of the photo i.e. area of interest. For e.g. if you need to share some image of your credit card, but there is always a need to hide credit card number or CVV printed at the back of the card.
This tool is a great application to achieve the objective of blur photo. There is an option to select the area of interest, which can be easily fine tuned by the using the option to resize.
- How the process of blur photo is done?

For e.g. you have taken photo of your credit. During the process to capture photos there all the confiedntial information is captured like credit card number, cvv etc. The process to blur photo will hide the confidential information by overlaying the area of interest with a unique color.
Steps to blur photo/images
- After cliking the open button, the photo will appear on the canvas. Scroll the "scroll bar" on the photo area in Canvas. The scroll bar will appear as "Cross Hair". Draw a rectangle and select the area of interest. Further, selection area can be refined by moving rectengular area up and down. Another option is to resize the rectengular area by taking the "scroll bar" at the circle of the rectangular region.
- If there is a need to change the color of blur then select the color from "blur color" pallette. Default color is white.
- If there is a need to change the intensity of the blur color then use the "blur intensity" range selection option.
- Once the selection is complete you can click on the blur photo.
- The last step is to click on the "save" button. Image will be saved with the prefix as blur. This is done to ensure that original file is not overwritten.
- Potential Caution.
-
It is strongly suggested to save a copy of your image and then make any edits on the copy rather than the original.
-
Please note there will be no mechnism to undo blur photo process.
-
If there is a need to resize photo according to the space then go to Resize Image. Resize photo according to the available space.
-
There could be change in the resolution of the image. However, our tool takes care by doing a comparison with the quality of the original photo. But, it is important to do a visual comparison with the original photo. This will eliminate any possibility of complete blur of photos.
-
There are 2 major operations which are required for proper delivery of photo according to the requirement. Following, URL's are a good combination accoring to the choice.
Resize Image:
Resize/Compress photo according to your requirement
Crop Photo: Crop unwanted area from photo.
-
Blur JPG PNG GIF Photographs online for free!!! Accomplish task in seconds
-
Blur image into rectangular and circlular region. Select the area of interest and blur the image
-
Blur photograph into rectagular region
